If you’ve been shooting in Auto and want to start making your own choices, this is a good place to begin.
What's included in the course
10 Video Lessons

Short lessons, each with a text outline you can come back to

5 Quizzes

Quick checks to see what’s sticking

4 Exercises

Simple assignments to try with your own camera

Also included: Exposure Simulator

Adjust aperture, shutter speed, and ISO and see the combined effects on exposure, depth of field, and motion in real time. Works in the course player and on the mobile app.
exposure simulator

You'll learn how to

  • Set your own exposure without relying on Auto
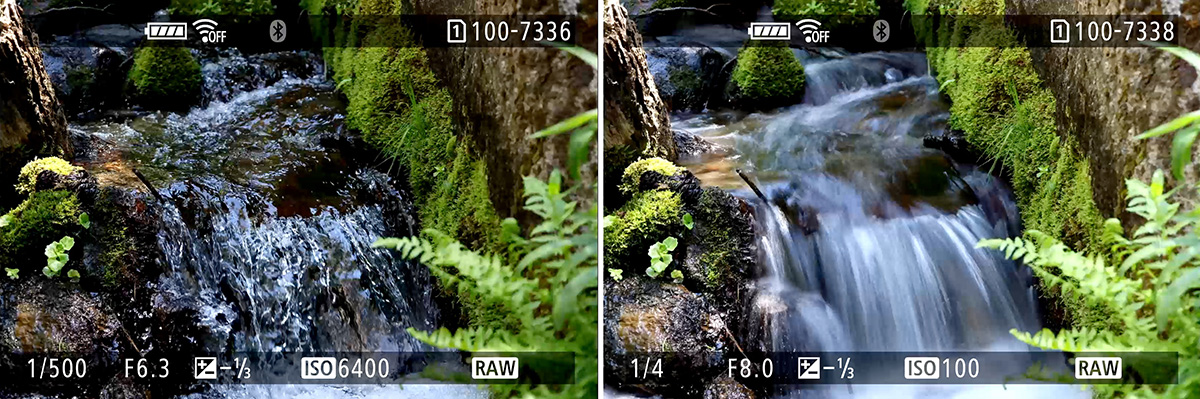
  • Use shutter speed to freeze or blur motion, like the water in these two photos
  • Use aperture to control how much of your photo is in focus
  • Understand “stops,” so you can trade one setting for another and keep the same brightness

"This course makes you think and teaches you about the exposure triangle fundamentally."

Leslie Hankey

Course overview

  • Understanding the camera basics (4 videos, 17 min)
  • Understanding stops of light (1 video, 11 min)
  • How aperture, shutter speed, and ISO work together (2 videos, 15 min)
  • Putting the exposure triangle into practice (2 videos, 12 min)
MEET YOUR TEACHER

John Peltier

I've worked as a documentary photographer since 2012, with projects in Haiti, Guatemala, Uganda, and more, and publications including New York Magazine, the Los Angeles Times, and the U.S. National Park Service.

Since 2017, I've brought that rigorous field experience to teaching, primarily to beginners working through the same struggles you're probably facing right now. These courses are built around a proven method to simplify the way you learn photography.

You can see my work at johnpeltierphotography.com.

Take the Photos Auto Mode Won’t

Photos like this one need a shutter speed of several minutes, which Auto mode usually won’t choose for you. This free course shows you how to set it yourself, along with aperture and ISO, so you can try shots like this on your own.